Una Discobrille con il WS2812b RGB LED Ring
Ciao e un caloroso benvenuto ad un altro Blogreihe nostro WS2812b RGB LED Ring. Anche questa volta si va di nuovo per il Tema "Upcycling". Nessuno, infine, a dire il Maker non pensare all'Ambiente :).
Questa volta "upcyclen" abbiamo un vecchio paio di Occhiali da sole a un elegante "Discobrille" per la prossima Discobesuch. Anche se io anche se non sono più Discogängern appartengo, trovo che sia un Progetto per i nostri giovani Maker tra i Lettori di dove dovrebbe essere. Spero vi piaccia l'Idea della Discoteca del LED con gli Occhiali per il prossimo Discobesuch! Per calare di certo in (Danza) Massa in modo. La WS2812b LED Anelli di agire come "Lenti". Il Telaio intorno alle due Occhiaie si può da un vecchio paio di Occhiali da sole a montare. Come MC usiamo di nuovo per motivi di Spazio l'Arduino Nano, come Alimentatore un Powerbank USB dal telefono Cellulare. Per il Cablaggio raccomando, l'Elettronica e l'Alimentazione di Occhiali di affidare, pertanto è sufficiente di sull'Orecchio destro o sinistro Staffa sottile, 3 fili nel Cavo attraverso la parte superiore in una Centralina nella tasca della camicia o in Tasca sparire. In questa Centralina costruisce il Tasto e altri Sensori (nei prossimi Parti) per il Controllo degli Occhiali. Per i nostri Blog abbiamo bisogno seguente configurazione hardware:

Come Parti non vi serve molto:
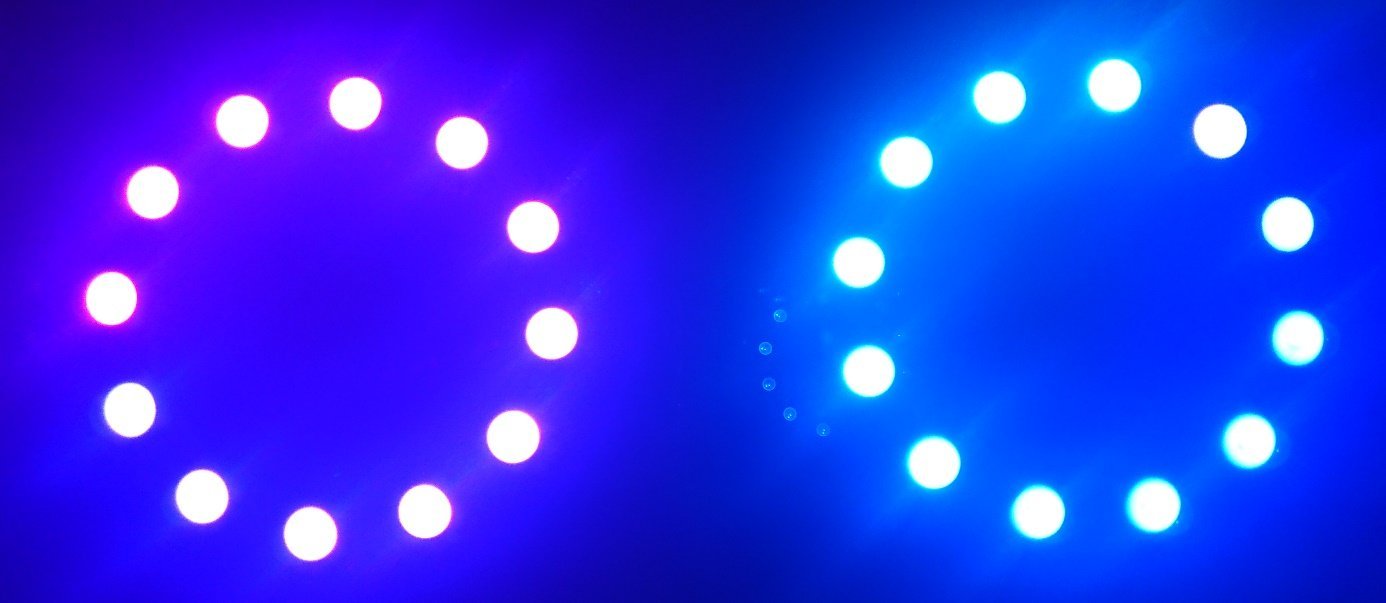
2 x RGB LED Ring WS2812b con 12 Led RGB 5V per Arduino 50 mm Diametro esterno
1x Tasto
1x Powerbank Usb e Cavo USB adatto per Arduino Nano
Se la Pubblicazione dei stata costruita, abbiamo ora la Adafruit Neopixel Libreria di integrare, per i LED dell'Anello semplicemente verso.
Il tempo di Libreria 2 Vie dei nostri IDE possono essere aggiunti:
1.) La Biblioteca del URL https://github.com/adafruit/Adafruit_NeoPixel scaricare. Poi nell'IDE, Voce Sketch -> Libreria di montaggio>Zip Biblioteca aggiungere manualmente.
2.) Nell'amministratore di librerie come Termine di ricerca "Adafruit Neopixel", in Libreria, quindi "Installa" per scegliere. Per favore, almeno la Versione 1.2.4 selezione.

Se fino a qui tutto ha funzionato, si prega di Codice riportato di seguito il Nano caricato:
#include <Adafruit_NeoPixel.h>

#define BUTTON_CHANGEANIMATION  12    // Digital IO pin connected to the button. This will be                                       // driven with a pull-up resistor per the switch should                                       // pull the pin to ground momentarily. On a high> low                                       // transition the button press logic vuole execute.
#define PIXEL_PIN    6    // Digital IO pin connected to the NeoPixels.
#define PIXEL_COUNT 24   // Tutti i Pixel on Umbrella
#define MaxAninmationsAvail 1
#define STATUS_PIN 13 // Animazione Control Button
Adafruit_NeoPixel strip = Adafruit_NeoPixel(PIXEL_COUNT, PIXEL_PIN, NEO_RGB + NEO_KHZ800);

const int hueRedLow = 0;
const int hueRedHigh = 255;
const int hueBlue = 170;
// The size of the angle of one sector (1/6 of a colour wheel), and of a complete
// cycle of the colour wheel.
const int angleMin = 0;
const int angleSector = 60;
const int angleMax = 360;
const int brightMin = 0;
const int brightMax = 255;

byte hue, brightness;
// The saturation is fixed at 255 (full) to remove blead-through of different
// colours.
// It could be linked to another potenziometro if a demonstration of hue
// is desired.
byte saturation = 255;

// Timer Variabile
int TimerSeconds = 0;  // Contatore
int TimerAlarmSet = 15; // 15 Secondi Timer
bool TimerStartFlagFlag = false;
bool TimerStop = true;

//Operations Manual
bool ButtonAPress  = false;
byte LedMode = 2;

//AnimationControl
int ShouldAnimation  = 0;
int IsAnimation  = 0;
int OLDLightBorder = 0;
bool GetONOFFStatus = false;

bool OLDONOFFStatus = false;
bool PlayIntro = false; // Intro
bool PlayOutro = false; // Outro
bool ChangeAnimation = false;
bool RunOnce = true;   //universal variabile
byte a,c,d,e,f;
unsigned int r, g, b;

//Routines di Interrupt

ISR(TIMER1_COMPA_vect)         {
 bool LEDChange,PressedZ;
 //Switch Query
 PressedZ= digitalRead(BUTTON_CHANGEANIMATION);
 if ((PressedZ == LOW) and (ButtonAPress == false))     {       ButtonAPress = vero;            }     TCNT1 = 0;      // Registro di inizializzazione
}

//Interrupt di fine

// iniziare Programma
void setup()    {          striscia di.iniziare();     strip.show();   // Inizializza tutti i pixel in 'off'     pinMode(BUTTON_CHANGEANIMATION, INPUT_PULLUP);     pinMode(STATUS_PIN,USCITA);     digitalWrite(STATUS_PIN, ALTA);     randomSeed(analogRead(0));     noInterrupts(); // disabilita Tutti gli Interrupt     TCCR1A = 0x00;       TCCR1B =  0x02;     TCNT1 = 0;      // Register initalization     OCR1A =  33353;      // Carico di Uscita Confrontare Registro     TIMSK1 |= (1 << OCIE1A);  // Attivare il Timer Confrontare Interrupt      interrupt();   // Abilita tutti gli Interrupt     Seriale.iniziare(9600);     Seriale.a filo();    }

// Funzioni di Aiuto
void HSBToRGB(     unsigned int inHue, unsigned int inSaturation, unsigned int inBrightness,     unsigned int *o, unsigned int *oG, unsigned int *oB )
{     se (inSaturation == 0)     {         // acromatico (grigio)         *o = *oG = *oB = inBrightness;     }     altro     {         unsigned int scaledHue = (inHue * 6);         unsigned int settore = scaledHue >> 8; // settore da 0 a 5 in giro per la ruota dei colori         unsigned int offsetInSector = scaledHue - (settore << 8);  // posizione all'interno del settore         unsigned int p = (inBrightness * ( 255 - inSaturation )) >> 8;         unsigned int q = (inBrightness * ( 255 - ((inSaturation * offsetInSector) >> 8) )) >> 8;         unsigned int t = (inBrightness * ( 255 - ((inSaturation * ( 255 - offsetInSector )) >> 8) )) >> 8;         interruttore( settore ) {         caso 0:             *o = inBrightness;             *oG = t;             *oB = p;             rompere;         caso 1:             *o = q;             *oG = inBrightness;             *oB = p;             rompere;         caso 2:             *o = p;             *oG = inBrightness;             *oB = t;             break;         caso 3:             *o = p;             *oG = q;             *oB = inBrightness;             pausa;         caso 4:             *o = t;             *oG = p;             *oB = inBrightness;             pausa;         di default:    // case 5:             *o = inBrightness;             *oG = p;             *oB = q;             pausa;         }     }
}

void CheckConfigButtons ()    // InterruptRoutine
{
bool PressedZ;

se (ButtonAPress == vero)    {     ShouldAnimation = !ShouldAnimation;     ritardo(250);     ButtonAPress = false;    }
}

void AnimationControl ()
{   int GetSelAnimation = 0;       se (GetONOFFStatus != OLDONOFFStatus)     {     OLDONOFFStatus = GetONOFFStatus;     se (GetONOFFStatus)        {       randomSeed(analogRead(3));            GetSelAnimation = 1;       ShouldAnimation = GetSelAnimation;       Seriale.di stampa ("Sistema. Selezionato: ");       Serial.println (ShouldAnimation);       } altro       {       Seriale.di stampa ("il Sistema si SPEGNE. Secondi:");       TimerStartFlagFlag = false;       Seriale.println (TimerSeconds);       ShouldAnimation = 0;       }   }    }

// Ciclo Principale -----------------------------------------------------------------------

void loop()    {     AnimationControl();     RunAnimations();     CheckConfigButtons();   }

// Ciclo Principale ----------------------------------------------------------------------- Ende


//Intro
void Intro_RaiseRainbow(bool risefall)
{   luminosità = 255;   int Rainbowcolor = 0;
 se (risefall)
 {   per (int io=0; ho < strip.numPixels(); i++)      {      // wdt_reset();       hue = la mappa(ho + Rainbowcolor, angleMin, 60, hueRedLow, hueRedHigh); //Impostare il Minuto di Colore       HSBToRGB(tinta, saturazione, luminosità, &r, &g, &b); //Imposta l'Ora di Colore       striscia.setPixelColor(io, r, g, b);     //Calulate Valori RGB per Ora Pixel       striscia.mostra();       un ritardo(40);     }
 } altro
 {      per (int io=0; ho < strip.numPixels(); i++)      {      // wdt_reset();       striscia.setPixelColor(ho, 0, 0, 0);       strip.show();       ritardo(40);     }
 }
}
//Animazioni
void Ani_AllOff ()
{
per ( int io = 0; ho < strip.numPixels(); mi++)      {               striscia.setPixelColor(ho,0, 0, 0);      // tutti fuori di      }
striscia.mostra();
}

void Ani_Rainbow(byte ritardo)
{   luminosità = 100;   int Rainbowcolor = 0;   fare   {   per (int io=0; ho < strip.numPixels(); ho++)      {        hue = la mappa(ho + Rainbowcolor, angleMin, 60, hueRedLow, hueRedHigh);            HSBToRGB(tinta, saturazione, luminosità, &r, &g, &b);        striscia.setPixelColor(io, r, g, b);        }   strip.show();   / Mostra/ risultati :)   ritardo(ritardo);   Rainbowcolor++ ;   } mentre (Rainbowcolor < 61);
}

void RunAnimations()
{   se (!(ShouldAnimation == IsAnimation))   {     PlayOutro = vero;     ChangeAnimation = vero;   }
interruttore (IsAnimation)    {      case 0:                                    // tutti LedsOFF       if (PlayIntro)          {                  PlayIntro = false;         RunOnce = true;         }        if   ((!(PlayIntro)) &&  (!(PlayOutro)))        {           if (RunOnce) {  Ani_AllOff (); }          RunOnce = false;        }        if  (PlayOutro)          {                PlayOutro  = false;         PlayIntro = true;         RunOnce = true;         IsAnimation = ShouldAnimation;         }               break;       case 1:            if (PlayIntro)          {         Intro_RaiseRainbow(true);            PlayIntro = false;         }         if  ((!(PlayIntro)) && (!(PlayOutro)))         {           Ani_Rainbow(20);         }        if  (PlayOutro)          {         Intro_RaiseRainbow(false);                      PlayOutro  = false;         PlayIntro = true;         IsAnimation =  ShouldAnimation;         }              break;    }    }
Ora brevemente il Tasto e lo Spettacolo godere :) . Premendo un altro Pulsante, attiva gli Occhiali di nuovo.
Mi auguro tanto Divertimento nel Costruire e, come sempre, fino alla prossima Volta.


4 commenti
Tobias
In der Tat hat sich ein kleiner Fehler in das Fritzing Bild eingeschlichen. Natürlich müssen die Ringmassen auch mit GND verbunden werden. Für die Verbindung der Ringe ist folgendes zu beachten :
D6 > DI (Ring1) DO (Ring1) → DI (Ring2)
Sascha
Moin
Von der Idee her, finde ich es gut, aber mir stellt sich die Frage ob es funktioniert wenn die Ringe keinen Null bekommen.
Geht dir nichts an
Die Fritzing funktioniert so nicht, Masse (gnd) ist zwar zwischen den einzelnen Ringen verbunden, aber nicht zum Breadboard … dafür aber 2 mal die 5V Verbindung.
P.S.: Wenn ihr nächstes mal das Bild mit halb so vielen Pixeln veröffentlicht, dann sieht man auch solche Fehler nicht mehr. (Oder in anderen Worten: Bitte einen link zu einem Fritzing Bild mit höherer Auflösung damit die Leute auch erkennen können was wohin geht, denn hier sind die Beschriftungen nicht mehr zu erkennnen)
Bernd
Der Schaltplan sieht ja ganz nett aus, aber die zwei RGB LED Ringe brauchen nicht nur die GND Verbindung untereinander sondern auch noch die GND Verbindung zum Breadboard, oder nur zwei schwarze Verbindungen von den Ringen zum Breadboard auf GND. Etwa so wie bei zwei den roten +5V Verbindungen.