Product recommendations
Product Description
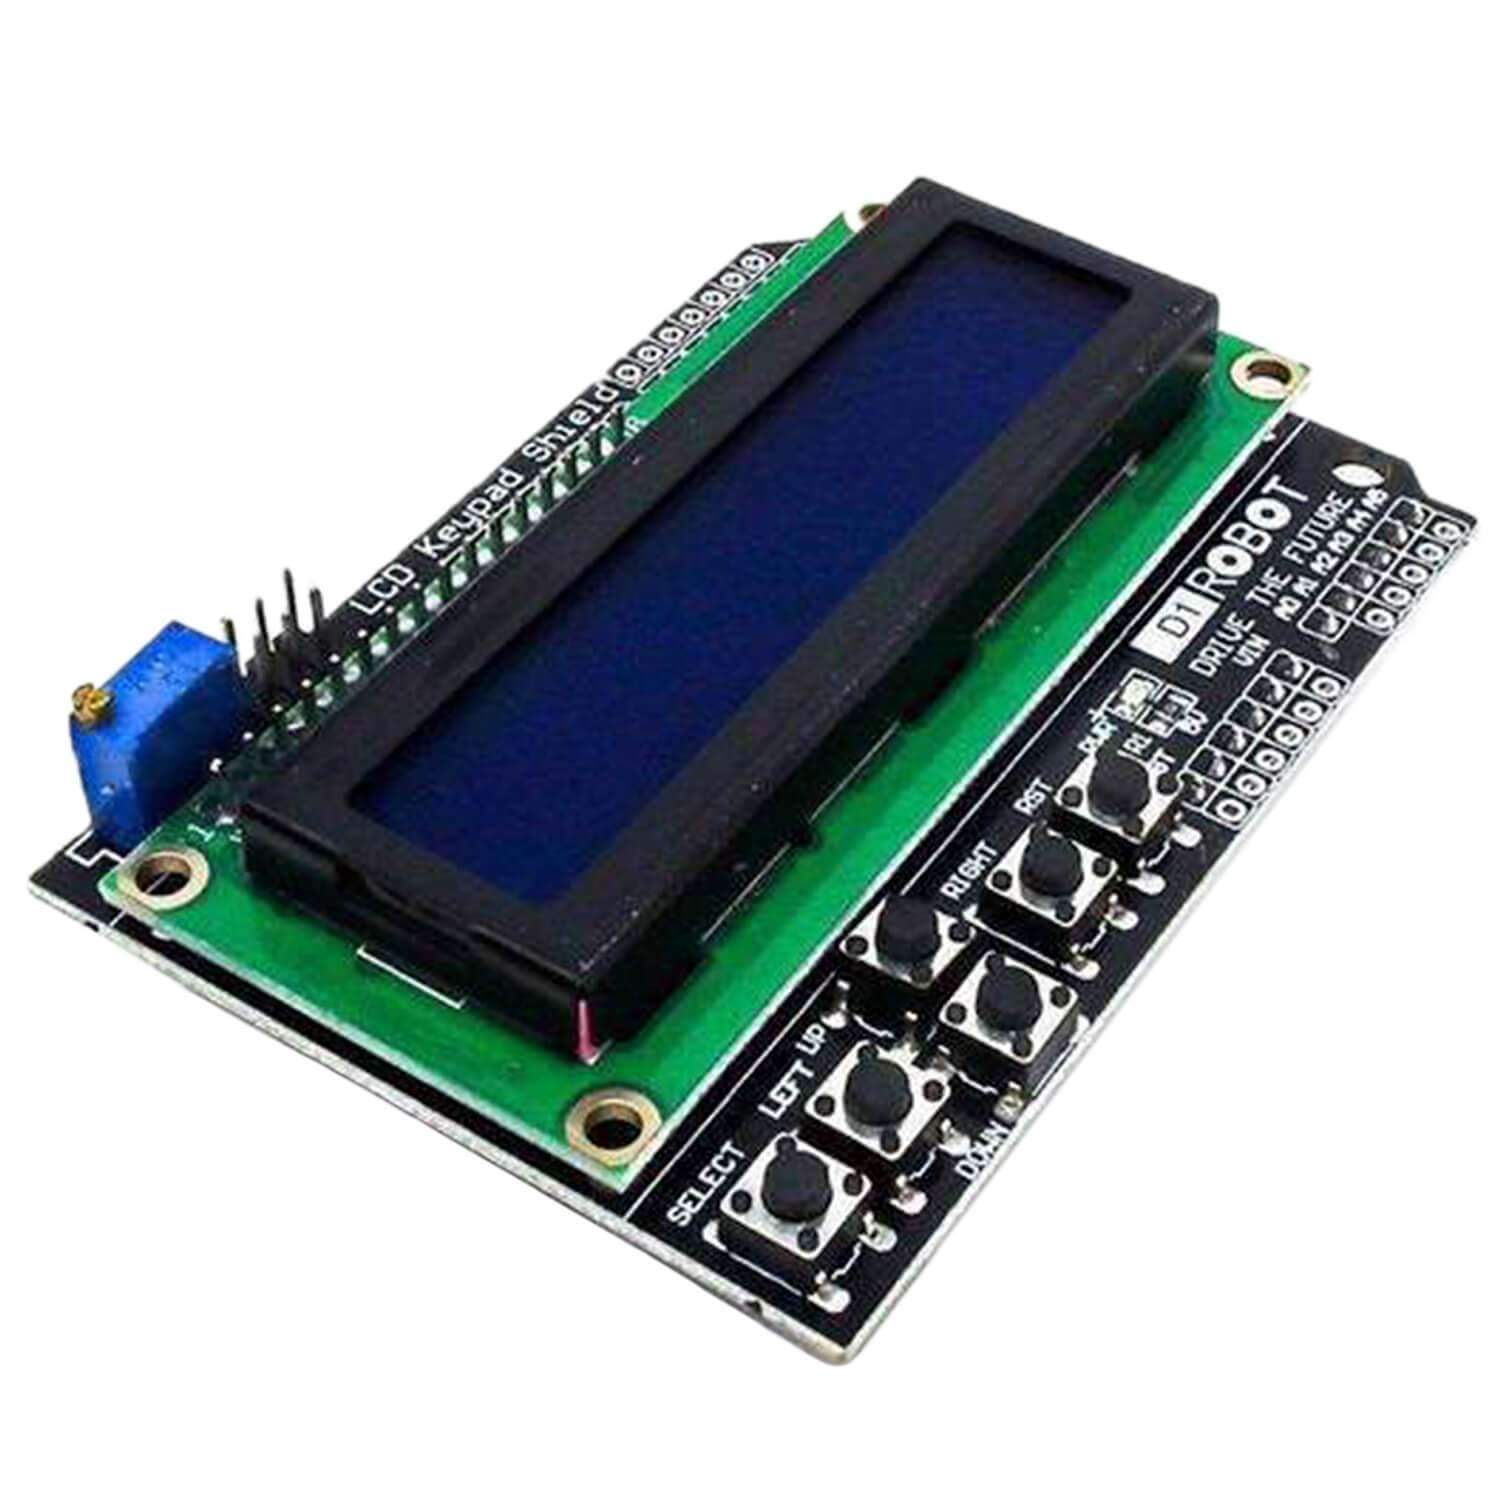
The AZ-Delivery LCD Shield has a 2-line display with 16 characters each (white font on blue background) and 6 pushbuttons for input.
Connections 4, 5, 6, 7, 8, 9 and 10 are used for the LCD interface. The push buttons are read in via a resistor network at analog input pin 0.
The contrast of the display can be adjusted by a potentiometer, the backlight can be switched on and off.
The pin assignment of the LCD panel is described in the e-book. The RST button can be used to reset the Arduino program.
Specifications:
- Size: 80 mm x 58 mm
- There are 5 slots available for connecting analog sensors.
- Operating voltage: 5V
- Various applications: It is ideal for monitoring values from multiple sensors or supplementary information.
- Extended available I/O pins
With your order at AZ-Delivery you get a product in usual high quality and with delivery directly from Germany!
For further ideas and projects please also visit our blog or download our eBooks!
AZ-Delivery: Your expert for microelectronics!
Wichtige Downloads & Links
Payment methods
Your payment information is processed securely. We do not store credit card details nor have access to your credit card information.
Our bestsellers


Featured project proposal
Wie viele vll. wissen unterstützt das Dev Board mit ESP32 von Espressif den Deep Sleep Modus. Leider wurde diese Funktion nicht gut implementiert, es gibt gleich mehrere Schwächen die es zu beachten gilt. Zum ersten geht bei einem Deep Sleep der Inhalt aller Variablen verloren, zum zweiten startet der ESP32 nach einem Deep Sleep wakeup wieder in die void setup() Schleife. Hinzukommt ein noch schlimmeres Problem: Der Wakeup funktioniert nicht zuverlässig. Hat sich der ESP ein paar mal schlafen gelegt, kann es passieren das er einfach nicht mehr aufwacht. Ohne diese Fallstricke währe der Deep Sleep Modus nur ein Dreizeiler. Da jedoch viele Kunden damit Probleme haben möchte ich hier einen Sketch zur Verfügung stellen und kurz kommentieren worauf es ankommt.
Weitere Projektvorschläge
Raspberry mit 7-Segment Anzeige
Heute zeigen wir Ihnen wie man unsere 7-Segment Anzeige auch über den Raspberry Pi in betrieb nehmen kann. Ich starte mit einem frisch installierten Raspberry Pi 3 Model B, der ...
Uno R3 Spielekonsole basteln
Mit diesem Blog möchten wir euch zeigen wie ihr euren Arduino mit dem Joystick Gamepad Shield und dem Nokia Display anwenden könnt. Wir lassen am Display anzeigen, welche Positi...
More recommended products


Books


