This post is also available as PDF document.
In order to be able to send messages as SMS from anywhere with the ESP32/ESP8266, you need a GSM module. There is rarely a LAN available there. About the fact that the ESPs can be used in a variety of ways from home with WiFi access TCP/HTTP, MQTT or UDP It also works, I already wrote that. The links are just a small selection. A secure bidirectional connection is established using TCP. This means you can also access a web server on the ESPs from abroad if port forwarding is set up on the DSL router. However, HTTP requires a request from a client's browser to actively establish the connection. With MQTT I need a broker on a home server, for example a Raspi, that coordinates data exchange, collects and passes on information.
In some cases, however, it is better if the ESP32 contacts the client, i.e. a cell phone or tablet, to leave a message. Their input can be connected to a signal. We're talking about emails. Yes, that's right, the ESP32 and the ESP8266 can both send email messages from a LAN. You'll find out how this works in this new episode of the series
MicroPython on the ESP32 and ESP8266
today
Email messages from ESP32 and ESP8266 - Part 1
First of all: Both the ESP32 and the ESP8266 can send emails, because both have a WLAN interface. The test program email.py runs without changes on both systems. The required module micro-mail in umail.py is quite manageable with its 126 program lines.
Things are different with the module bme280 out of. The application bme280-monitor.py (follows in part 2), which uses the module, can only be run on an ESP32 for reasons of space.
However, any event that can be recorded using sensors and evaluated by the controller can be used as an application - land in the basement, mousetrap has sprung, burglar in the apartment, and so on. So what we need for this project in any case is a controller. Whether it can be an ESP8266 or has to be an ESP32 ultimately depends on the type and variety of other components. One GPIO pin is sufficient for each water level sensor. This also applies to an acoustic alarm. For a display I need two to three, depending on whether the display is on the I2C or SPI bus. On the ESP8266, the digital inputs of 9 are not exactly available in abundance and their usability is also severely limited by other functions, mostly relating to the start of the system. This is shown in Table 1.
|
label |
GPIO |
Input |
output |
Notes |
|
D0 |
GPIO16 |
No IRQ |
No PWM or I2C support |
HIGH at boot |
|
D1 |
GPIO5 |
OK |
OK |
SCL when using I2C |
|
D2 |
GPIO4 |
OK |
OK |
SDA when using I2C |
|
D3 |
GPIO0 |
pulled up |
OK |
FLASH button when LOW Normal boot when HIGH |
|
D4 |
GPIO2 |
pulled up |
OK |
Must be HIGH when booting |
|
D5 |
GPIO14 |
OK |
OK |
SPI (SCLK) |
|
D6 |
GPIO12 |
OK |
OK |
SPI (MISO) |
|
D7 |
GPIO13 |
OK |
OK |
SPI (MOSI) |
|
D8 |
GPIO15 |
pulled to GND |
OK |
SPI (CS) |
|
RX |
GPIO3 |
OK |
RX pin |
Must be HIGH when booting |
|
TX |
GPIO1 |
TX pin |
OK |
Must be HIGH when booting |
|
A0 |
ADC0 |
Analogue input |
X |
Table 1: Pin assignment and system functions for the ESP8266
This is important to consider when selecting the controller. The ESP32, on the other hand, is much less demanding in this respect.
Hardware
In principle, any of the types listed can be used just to send emails. In addition to the controller, the list of components also includes the parts that will be used in the next episode.
In order to be able to view the status of the circuit directly on site at any time, I gave the ESP a small display that is controlled via the I2C bus. It is even capable of graphics and could therefore also display changes in the measurement signal over time as a curve. Using the flash button it would be possible to switch between text and graphic mode and, if pressed for a longer period of time, the program could be aborted in an orderly manner if, for example, actuators had to be switched off safely.
As a measurement application, I chose a climate monitor with the BME280. The Bosch sensor can record air pressure, relative humidity and temperature. The boss in my circuit will therefore be an ESP32.
|
1 |
D1 Mini NodeMcu with ESP8266-12F WLAN module or D1 Mini V3 NodeMCU with ESP8266-12F or NodeMCU Lua Amica Module V2 ESP8266 ESP-12F WIFI or NodeMCU Lua Lolin V3 Modules ESP8266 ESP-12F WIFI or ESP32 Dev Kit C V4 unsoldered or ESP32 NodeMCU Module WLAN WiFi Development Board with CP2102 or |
|
1 |
|
|
1 |
GY-BME280 Barometric Sensor for temperature, humidity and air pressure |
|
1 |
|
|
various |
Jumper Wire Cable 3 x 40 PCS. 20 cm each M2M/ F2M / F2F maybe too |
|
optional |
The software
For flashing and programming the ESP32:
Thonny or
Firmware used for the ESP32:
Firmware used for the ESP8266:
The MicroPython programs for the project:
ssd1306.py Hardware driver for the OLED display
oled.py API for the OLED display
umail.py Micro-mail module
email.py Demo program for sending emails
MicroPython - language - modules and programs
To install Thonny you can find one here detailed instructions (english version). There is also a description of how to do this Micropython firmware (as of June 18, 2022) on the ESP chip burned becomes.
MicroPython is an interpreter language. The main difference to the Arduino IDE, where you always and only flash entire programs, is that you only need to flash the MicroPython firmware once at the beginning on the ESP32 so that the controller understands MicroPython instructions. You can use Thonny, µPyCraft or esptool.py to do this. I have the process for Thonny here described.
Once the firmware is flashed, you can have a casual conversation with your controller, test individual commands, and immediately see the response without having to compile and transfer an entire program first. That's exactly what bothers me about the Arduino IDE. You simply save a lot of time if you can carry out simple syntax and hardware tests through to testing and refining functions and entire program parts via the command line before you build a program from it. For this purpose, I always like to create small test programs. As a kind of macro, they combine recurring commands. Entire applications sometimes develop from such program fragments.
Autostart
If you want the program to start autonomously when the controller is switched on, copy the program text into a newly created blank file. Save this file as boot.py in the workspace and upload it to the ESP chip. The next time you reset or switch on, the program starts automatically.
Test programs
Programs are started manually from the current editor window in the Thonny IDE using the F5 key. This is faster than clicking on the start button or using the menu run. Only the modules used in the program must be in the flash of the ESP32.
Arduino IDE again in between?
If you later want to use the controller together with the Arduino IDE again, simply flash the program in the usual way. However, the ESP32/ESP8266 then forgot that it ever spoke MicroPython. Conversely, any Espressif chip that contains a compiled program from the Arduino IDE or the AT firmware or LUA or ... can easily be provided with the MicroPython firmware. The process is always like this here described.
An email from the controller
The microcontroller does not have its own email server to receive and send emails. This can be achieved via external providers. It's not a good idea to send messages from your own email account through an ESP for a variety of reasons to ship allow. Security aspects and a possible blocking of the account clearly speak against this if the ESP messes up and, for example, sends a lot of emails within a short period of time or causes other errors that the provider punishes. That's why I'm starting here by setting up a new Google account through which the ESP can then work. As a recipient, you can use your normal email account, with the same provider or a different one, it doesn't matter.
Set up a Google account
Today you can/must log in to an email provider with a cell phone, tablet or PC using 2-way authentication, which is the safe way. This does not work when registering other devices, such as a microcontroller. You cannot receive and confirm the authentication link or SMS. It's been some time since the only way out in such cases was insecure simple authentication using a username and password. However, this was no longer supported by some providers.
Today I will introduce you to a way to still send an email with your ESP. This is achieved with the help of an app password, a combination of 16 characters that you can assign to a specific application or device.
Let's start with that Creating a new Google account. Follow the link and click create Account.
Now follow the user guidance. A little tip: it is not necessary to provide your actual personal information such as name and date of birth, you can also fake them. You just have to be reachable via telephone or cell phone number in the next chapter at the latest to confirm your email address.

Figure 1: Enter name and password
In the first step you enter a name and Google generates some email addresses from it. Pick one or enter one, but please not your main email address! Build a password. - Further

Figure 2: Date of birth and gender
The date of birth can be faked like the name. It is best to choose one from the years before 2004. – Next

Figure 3: Personalization settings
To see what personalization entails, choose Manual Personalization, even if it takes longer.

Figure 4: Do not save activities
You will rarely check your email account, so you probably don't care what can be saved. - Further

Figure 5: Don't save YouTube history
You may also care less about YouTube history and the advertising that pops in. - Go on, go on

Figure 6: General advertising

Figure 7: No memories
Since you probably don't want to change any of the settings, you don't need any reminders. - Go on - and then that's it.

Figure 8: Summary
At the bottom you will find a continue button and then left-clicking on Google Account at the top left will take you to the homepage of your new account. Sign out now.
Creating an app password
After you re-register, you will probably receive a message.

Figure 9: Disable smart features
You can deactivate the intelligent functions because the ESP32/ESP8266 will not use them anyway.
On the homepage at the top right, click on the button with your initial. Left click on Manage Google Account A menu will appear on the left. Click there Security.

Figure 10: Access security

Figure 11: Sign in to Google
In the Security window, scroll to Sign in to Google. Before an app password can be assigned, it must be Two-step verification to be activated. Start by clicking on the larger sign.

Figure 12: Setting up your smartphone
Now you need the cell phone number. Unfortunately, you have to enter your own here because Google will send you a verification code.

Figure 13: Confirm number
You will receive a six-digit verification code via SMS. - Next - Activate

Figure 14: Activate

Figure 15: Confirmation activated
By clicking on Google account return to the administration page. Scroll in again Security until Sign in to Google.

Figure 16: Security - App Passwords
There is no app password set up yet, so let's create a first one. You can also create multiple ones, one for each client. Click on the larger sign.

Figure 17: Re-authentication
Google requires you to re-authenticate with your username and password. - Further

Figure 18: Select app
Choose as app e-mail off, as a device Other.

Figure 19: Select device
Then enter any device name. - To generate

Figure 20: Specify device name

Figure 21: Remember generated app password
Even if it is at use is different, In any case, remember the generated passwordt, a sequence of 16 lowercase letters. You will need this later for the program. Keep the code safe. - Complete

Figure 22: The app password is saved
The app password has now been generated and you can get started.

Figure 23: Now you're ready to get started
We send emails
The SMTP protocol (Simple Mail Transfer Protocol), which is used to send emails, is a human-readable protocol that is based on TCP data streams. A secure, bidirectional connection is negotiated between the client and server for the transmission. “Secured” here refers to the properties of lossless and error-correcting, not tap-proof. Nevertheless, a type of encryption is used to transfer username and password, Base64. With this coding, three normal bytes become four ASCII characters from the range A-Z, a-z, 0-9,+ and /. Attachments, such as images, are also encoded in Base64. This explains why the volume increases during image transmission.
Now first download the MicroPython file umail.py down. Save it in your working directory (_workspace by Thonny). Upload the file to the ESP32/ESP8266. The original comes from Shawwn, for debugging purposes I included some print lines, which also reveal the structure of a transfer. The output in the terminal occurs when you enter the parameter when calling the constructor debug = True set.
smtp = umail.SMTP('smtp.gmail.com', 465, ssl=True, debug=True)
But let's go one step at a time.
import umail
import network
import sys
from time import sleep
from machine import SoftI2C,Pin code
# Enter your own access data here
mySSID = 'EMPIRE_OF_ANTS'
myPass = 'nightingale'
Some imports provide us with the necessary ingredients, umail is the most important one here. For mySSID and myPass please give that Credentials for your WiFi router.
class MailError(Exception):
passport
class UnknownPortError(MailError):
def __init__(self):
print("System error\nunknown port")
print("Only ESP32, ESP8266 are supported")
The two exception classes are used to handle errors when determining the port.
if sys.platform.platform == "esp8266":
    i2c=SoftI2C(scl=Pin code(5),sda=Pin code(4))
elif sys.platform.platform == "esp32":
    i2c=SoftI2C(scl=Pin code(22),sda=Pin code(21),freq=100000)
else:
    raise UnknownPortError()
An UnkownPortError exception is thrown if the controller identifies itself as neither ESP32 nor ESP8266.
sender_email = 'ernohub@gmail.com'
sender_name = 'ESP32' #sender name
sender_app_password = 'xxxxxxxxxxxxxxxx'
='my@mail.org'
email_subject ='Test email'
sender_email is the Google account with the associated app password that we created above. At recipient_email Enter your email address where you would like to receive the messages.
connectStatus = {
    1000: "STAT_IDLE",
    1001: "STAT_CONNECTING",
    1010: "STAT_GOT_IP",
    202:  "STAT_WRONG_PASSWORD",
    201:  "NO AP FOUND",
    5:    "UNKNOWN"
    }
The Dict connectStatus translates the status codes of the station interface into plain text.
def hexMac(byteMac):
  """
  The hexMAC function takes the MAC address in bytecode and
  forms a string for the return
  """
  macString =""
  for i in range(0,len(byteMac)):     # For all byte values
    macString += hex(byteMac[i])[2:]  # String from 2 to end
    if i <len(byteMac)-1 :            # Delimiter
      macString +="-"                 # except for the last byte
  return macString
The functoin hexMac() tells us the MAC address of the WLAN interface.
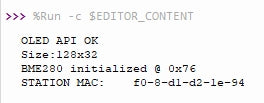
Figure 23: MAC query
This must be entered in the router so that the controller can gain entry from the bouncer (MAC filter). With a TP-LINK router it looks like this:

Figure 24: MAC filtering

Figure 25: MAC filtering - entry
Then we establish a connection to the router. While the process is running, points are output in the terminal every second.
Sending an email is thanks to the module umail not a big act.
# ***************   Send an email   ********************
#
smtp = umail.SMTP('smtp.gmail.com', 465, ssl=True, debug=True)
smtp.Log in(sender_email, sender_app_password)
smtp.to(recipient_email)
smtp.write("From:" + sender_name + "<"+ sender_email+">\n")
smtp.write("Subject:" + email_subject + "\n")
smtp.write("Greetings from ESP32/ESP8266")
smtp.send()
smtp.quit()
The constructor call creates an SMTP object. We pass the URL of the server and the port number of the SMTP portal. Then we send our G-mail ID and app password. The recipient is transferred, followed by the name and email address of the sender. A subject follows and then we send the body of the message. Longer texts can be divided into several write-Instructions are divided. So far we have only transferred the data to the G-mail server, which has diligently sucked it up. With send We give the order for forwarding to us as the recipient before we cut off the connection to the server.

Figure 26: esp32 sends emails from bme280
In the next blog episode we will put the BME into service as a sensor for pressure, relative humidity and temperature. In the program we can provide a time control, as well as an alarm function that immediately sends an email if, for example, the air pressure drops sharply in a short period of time, which is the case when a thunderstorm approaches.
See you then!


3 comments
Andreas Wolter
Danke für den Hinweis. Der Link wurde korrigiert.
Grüße,
Andreas Wolter
AZ-Delivery Blog
Norbert
Bitte eine kleine Korrektur an den Links für e-mail.py vornehmen:
statt: http://grzesina.de/az/email/e-mail.py
dieses: http://grzesina.de/az/email/e_mail.py
Danke
Werner
Der Link zu e-mail.py stimmt offensichlich nicht:
Not Found
The requested URL was not found on this server.