In one previous blog post we had first connected LCDs to the Raspberry Pi via GPIO pins as well as via I2C. However, these robust displays, each with 16 characters in two lines or 20 characters in four lines, are character-oriented. Thus, we can neither display an analog clock, or a pointer instrument for measured values, nor images. For this, we need either an OLED or a TFT display in mobile use. Here is a small overview:
|
Designation |
Techn. |
Bus |
Diag. |
Pix. x |
Pix. y |
Controller |
|
OLED |
I2C |
0,91 |
128 |
32 |
SSD1306 |
|
|
OLED |
I2C |
0,96 |
128 |
64 |
SSD1306 |
|
|
OLED |
I2C |
1,3 |
128 |
64 |
SH1106 |
|
|
OLED |
I2C |
0,66 |
64 |
48 |
SSD1306 |
|
|
TFT |
SPI |
1,77 |
128 |
160 |
ST7735 |
|
|
TFT |
SPI |
1,8 |
128 |
160 |
ST7735 |
Let's start with the easier to handle bus system I2C and thus the OLED displays. The abbreviation OLED stands for organic light emitting diode. It is a luminous thin-film device made of organic semiconducting materials. The electrical current density and luminance are lower than those of conventional LEDs.
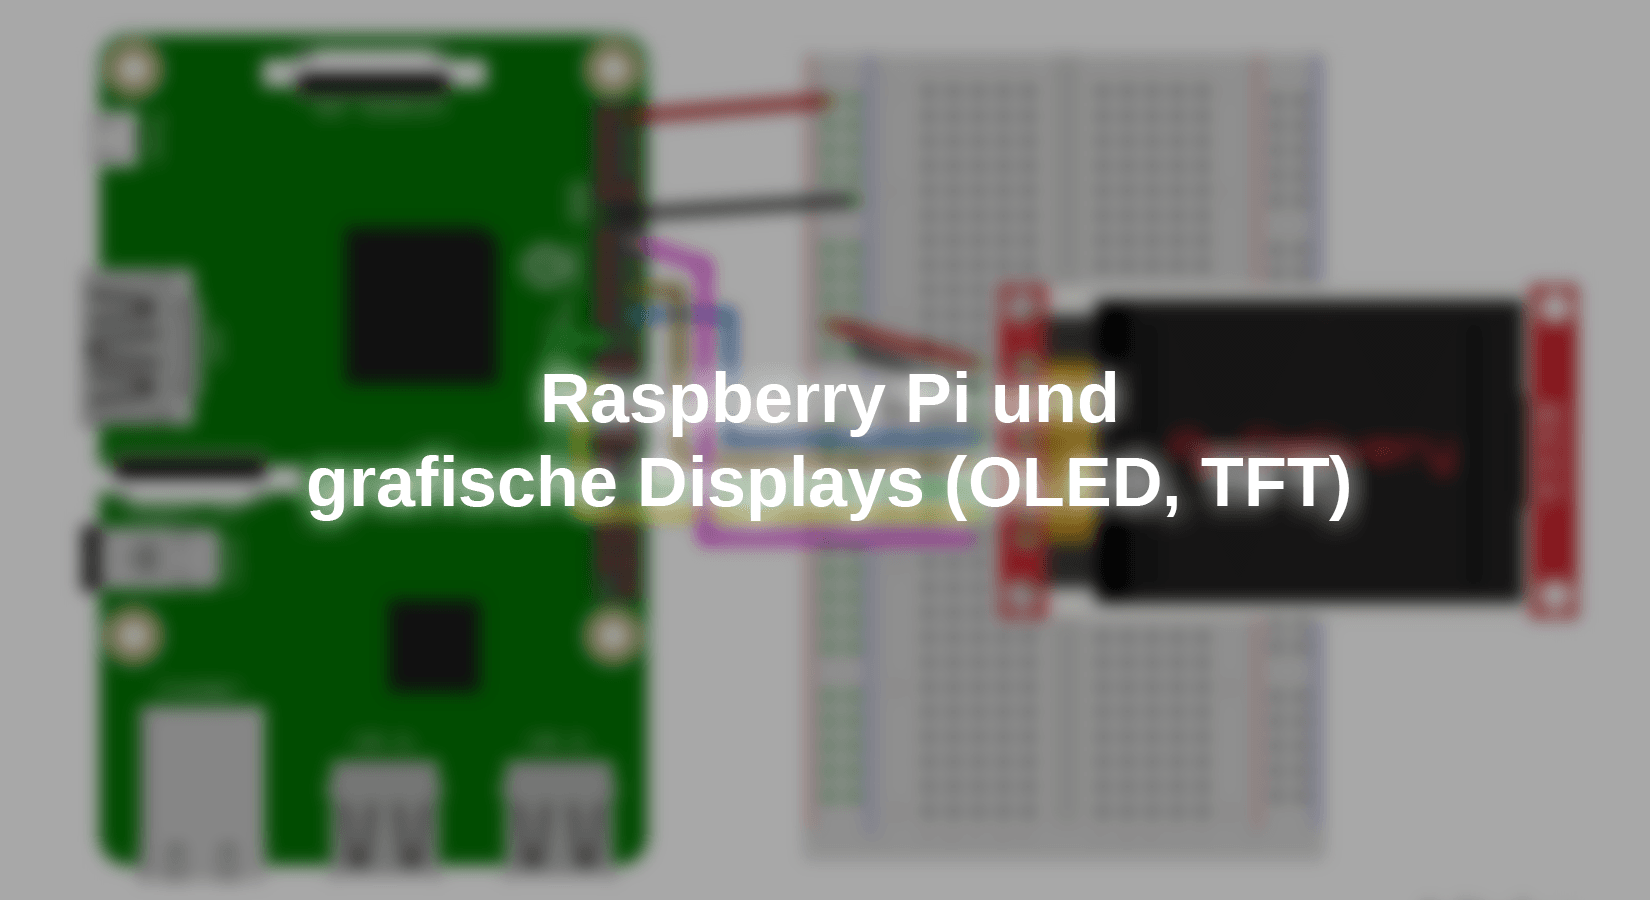
The circuitry of I2C devices on the Raspberry Pi is very simple. One connects the physical pins
- 1 = 3,3V
- 3 = I2C-SDA
- 5 = I2C-SCL
- 6 or 9 = Ground
with jumper cables. The displays are labeled. Nothing can really go wrong.

In the Raspberry Pi configuration the I2C interface is activated and then we first check the I2C addresses of the connected devices. For this the tool i2cdetect with the parameters -y 1 called in the terminal.

All OLED displays have the I2C address 0x3C. The second address 0x76 shown here belongs to the sensor BME-280, which is still connected from the last attempts.
Program library:
For programming the display, you are well advised to install a program library for Python. The recommendation is luma.oled by Richard Hull and many others. This constantly evolving, very comprehensive collection of Python modules is suitable for a wide range of displays, which may differ in resolution and image controller. Those with a current Raspberry Pi OS can install the Python modules and a collection of sample programs directly on the Raspberry Pi (description follows). For those who want to go deeper or use other hardware configurations, the following links are recommended:
https://github.com/rm-hull/luma.oled # Python modules (library)
https://github.com/rm-hull/luma.examples # Example programs
https://luma-oled.readthedocs.io/en/latest/ # Documentation
This library has also found its way into PyPi (The Python Package Index (PyPI) is a repository of software for the Python programming language.) and you can therefore install it directly on the Raspi with the tool pip.
The first module is called luma.oled, so the terminal command is:
$ sudo pip install luma.oled# see also note about SPI / ST7735
Without reading it explicitly, it seems that Python 2.7 is no longer used, so pip instead of pip3 and python instead of python3 can be used just as well.
The documentation says that first you have to install more libraries (dependencies) and second for the user (so far pi, today self chosen user name) with
sudo usermod -a -G spi,gpio,i2c user must grant the user access rights for the interfaces. Both are no longer necessary with a current Raspberry Pi OS.
The example programs are now no longer part of the library, but are available in a separate Github repository. To download, the command git clone with the link is used.
 $ git clone https://github.com/rm-hull/luma.examples.git
 $ cd luma.examples
Here is another subdirectory examplesinto which you can change. With ls the programs are displayed, see picture.

The library works with presets, namely I2C interface, address 0x3C, the image controller SSD1306 and the resolution 128x64. All these defaults apply to the 0.96" OLED display, which is displayed with the demo program demo.py works right away. Simply in the terminal
$ python demo.py
and graphical elements and "Hello World" will appear in the display.
The same applies if the Python program is started with Thonny, for example. But only if the default settings apply. Otherwise, the program must be started in the terminal with additional parameters that are transferred in the def main() function with get_device().
Demo programs in the terminal:
This applies e.g. to the 1.3" OLED display, which uses the SH1106 as image controller. How to pass which parameters can be found out by using the help function. So first enter the parameter --help or -h. The program call for the 1.3" OLED display is therefore:
$ python demo.py -d sh1106
The 0.91" OLED display also uses the SSD1306, but it only has a resolution of 128x32 pixels. Before you connect this narrow displayn eshort warning: mn most cases the pin order on I2C devices is VCC-GND-SCL-SDA, not on the 0.91" OLED! The order here is GND-VCC-SCL-SDA. The program call is done with the parameter --height 32
$ python demo.py --height 32
If you need to pass several parameters permanently, you can also save them in a configuration file (file extension .conf). There is even a subdirectory conf under luma.examples, where for a number of displays these files already exist. I discover the file st7735.conf, i.e. for the image controller ST7735, which is installed in the 1.8" TFT display with SPI interface.

In this text file I even discover the pin assignment of the pins, which are not mandatory assigned on the Raspberry Pi.
- RESET goes to GPIO24 = phys. Pin 18
- data-command (at display A0) goes to GPIO23 = phys. pin 16
- backlight LED at GPIO18 = phys. Pin 12 (this is better than at 3.3V!)
- VCC = 5V, so phys. Pin 2 or 4
- GND to any ground pin
- SCK to phys. Pin 23
- SDA (better known as MOSI or COPI) to phys. pin 19. Pin 19
- CS to CE0 = phys. Pin 24

Attention: Rear view! The VCC connection has a square border; in the following schematic at the top.
 I start the program call from the parent directory luma.examples, so I can easily access the subdirectories conf and examples.
$ python examples/demo.py--config conf/st7735.conf
After everything had worked on the first try so far, I now get the error message that st7735 does not belong to the known displays, just the different OLED image controllers.

After some research - the documentation is unfortunately neither up to date nor complete - I find a hint in a forum that the examples work for almost all displays, but the library luma.oled only for the listed OLED displays. So install another library with pip:
$ sudo pip install luma.lcd
https://luma-lcd.readthedocs.io/en/latest/ # documentation
You could have installed both libraries at once (see note above), but it doesn't say anywhere.
$ sudo pip install luma oled luma.lcd# Installation of both libraries for OLED and LCD/TFT
Now the TFT display also works with the above program call.
After I have also installed the example program clock.py with all displays in the terminal and tested it successfully, I would like to try out how these programs work in the Python environment, e.g. Thonny or IDLE.
OLED displays in the Python environment:
As described above, there were no difficulties for the 0.96" OLED display, since there are no parameters to pass here. The example programs demo.py and clock.py work as desired.
For the 1.3" OLED display with the SH1106 image controller, the device object is instantiated as follows:
from luma.core.interface.serial import i2c
from luma.core.render import canvas
from luma.oled.device import ssd1306, ssd1309, ssd1325, ssd1331, sh1106, ws0010
serial = i2c(port=1, address=0x3C)
device = sh11066(serial)
In turn, the lines are omitted:
 from demo_opts import get_device
 device = get_device()
The function get_device() from the module demo_opts does not need to be imported.
TFT displays in the Python environment:
For the 1.8" TFT display, more details have to be inserted, as expected:
from luma.core.interface.serial import spi
from luma.core.render import canvas
from luma.lcd.device import st7735
serial = spi(port=0, device=0, gpio_DC=23, gpio_RST=24)
device = st7735(serial)
Despite intensive study of the modules, I have not figured out how to enable GPIO control of the backlight. Permanently connecting to 3.3V does result in an image, but when inactive, the backlight glows very brightly.
Therefore I left the LED pin at GPIO18 and added the appropriate commands for switching between LOW and HIGH.
 import RPi.GPIO as GPIO
 gpio_LED=18
 GPIO.setmode(GPIO.BCM)
 GPIO.setup(gpio_LED, GPIO.OUT, initial=0)
and then
GPIO.output(gpio_LED, 1)
or behind the device.cleanup()
GPIO.output(gpio_LED, 0)
Download the two customized sample programs clock_sh1106_I2C.py and clock_st7735_SPI.py
Have fun integrating the small graphic displays into your projects.


1 comment
Jürgen Zetzmann
Moin Moin
Leider funktioniert die CS ( gpio 7 ). Nicht in luma LCD. Was aber sehr wichtig
Ist bei zwei tft Displays st7835 die von ihnen
Mfg Jürgen