The contribution is also a PDF document accessible.
What can you do if a project For example TCS3472 - color detection sensor with I2C in Micropython - Part 1, becomes increasingly extensive and the program parts no longer have space on the ESP32/ESP8266? Well, very simple, you can compile the modules, for example. As a result, they are shrunk to a good half. Another aspect could also be interesting: Compiled programs are no longer in plain text, so you can no longer see the original program structure. The output of a listing is no longer possible. How to compile a program, do you want to know? In this blog sequence, I will show you the procedure on Windows and Linux in small steps. Welcome to
Micropython on the ESP32 and ESP8266
today
MPY-CROSS-Compiler Use for the ESP family

Image 1: The circuit to the project
First of all: keep your original files with the ending .py Always well, because if you want to change something afterward, it can only be done in the text file. No more changes can be made to the compilation. The attempt to .Mpy-File to open in Thonny leads to the following edition:

Image 2: Thonny cannot open tcs3472.mpy
By compiling, I can also ensure that nobody can do my program on my program.
We come to the hardware. As the head of the project, I use an ESP32, but an ESP8266 does it too since I only need my color detection module and an OLED display for this post. As always, the circuit is set up on a Breadboard with several jumper cables.
Hardware
|
1 |
ESP32 Dev Kit C V4 unplacerated or |
|
1 |
Nodemcu Lua Amica Module V2 ESP8266 ESP-12F WiFi or |
|
1 |
|
|
1 |
|
|
1 |
The software
For flashing and the programming of the ESP32:
Thonny or
Used firmware for the ESP8266:
Be sure to take this version
Used firmware for the ESP32:
Be sure to take this version
The Micropython programs for the project:
SSD1306.PY Hardware driver for the OLED display
oled.py API for the OLED display
tcs3472.py Hardware driver for the color module
tcs3472.mpy Compiled hardware driver for the color module
colorcheck.py Demo program
MPY cross Micropython-Cross compiler (Windows and Linux)
Information on installation follows below.
Aid programs
HXD Hexeditor for displaying the content of binary files (freeware)
Micropython - Language - Modules and Programs
To install Thonny you will find one here Detailed instructions (English version). There is also a description of how the Micropython firmware (As of 18.06.2022) on the ESP chip burned becomes.
Micropython is an interpreter language. The main difference to the Arduino IDE, where you always flash entire programs, is that you only have to flash the Micropython firmware once on the ESP32 so that the controller understands Micropython instructions. You can use Thonny, µpycraft, or ESPTOOL.PY. For Thonny I have the process here described.
As soon as the firmware has flashed, you can easily talk to your controller in a dialogue, test individual commands and see the answer immediately without having to compile and transmit an entire program beforehand. That is exactly what bothers me about the Arduino IDE. You simply save an enormous time if you can check simple tests of the syntax and hardware to try out and refine functions and entire program parts via the command line before knitting a program from it. For this purpose, I always like to create small test programs. As a kind of macro, they summarize recurring commands. Whole applications then develop from such program fragments.
Autostart
If the program is to start autonomously by switching on the controller, copy the program text into a newly created blank tile. Save this file under boot.py in WorkSpace and upload it to the ESP chip. The program starts automatically the next time the reset or switching is on.
Test programs
Programs from the current editor window in the Thonny-IDE are started manually via the F5 button. This can be done faster than the mouse click on the start button, or via the menu run. Only the modules used in the program must be in the flash of the ESP32.
In between, Arduino id again?
Should you later use the controller together with the Arduino IDE, just flash the program in the usual way. However, the ESP32/ESP8266 then forgot that it has ever spoken Micropython. Conversely, any espressif chip that contains a compiled program from the Arduino IDE or AT-Firmware or Lua or ... can be easily provided with the Micropython firmware. The process is always here described.
Signals on the I2C bus
How a transmission works on the I2C bus and how the signal sequence looks, you can do in my post about Mammut matrix display part 2 read. I use one there Interesting little tool, with which you can get and analyze the i2C bus signals on your PC.
Compile on the Windows box
If you have installed Thonny on your Windows computer, Python 3.7 or higher must also be present, because Thonny is written in Python and therefore the Python runtime environment is required. This is comparable to the Micropython firmware on the ESP32/ESP8266. In this case, should already be an MPY cross on your computer.
Simply open the entry request once, enter the following line and press Enter.
PIP Install MPY-Cross
As a result, you will receive one of the two pieces of feedback from PIP.

Image 3: MPY-Cross is already installed
This is what it looks like when MPY-Cross is already installed on your system. You can find the EXE file in the specified directory.
If MPY-Cross was not yet installed before the PIP command was carried out, this is now the case.

Image 4: MPY-Cross was installed
To find out where mpy-cross.exe is located, enter the PIP command again, whereupon you receive the upper feedback with the target directory.
Why is the position of the file so important? In order to compile an MCP file, i.e. translate it into bytecode, you have to call MPY-CROSS with the name of the Micropython file as an argument. For this, they have three different options with very different comfort. I already present the first two-part -optimized.
- You are in the workspace of your project from Thonny and want the file py compil. Then the call is about that.
C: \ Users \ Root \ Appdata \ Roaming \ Python \ Python38 \ Site-Packages \ mpy_Cross \ mpy-cross.exe Painted_sky.py
- You are in the directory C: \ Users \ Root \ Appdata \ Roaming \ Python \ Python38 \ Site-Packages \ Mpy_Cross \ Mpy-Cross. Then you have to specify the path to your source file and it can also have a somewhat elongated figure.
MPY-CROSS F: \ P_Programming \ az-blog ___ color detection with TCS3472 \ _WorkSpace \ painted_sky.py
- I decided on the most convenient path, and it goes like this: I enter the path to mpy-cross.exe in the path variable path of my Windows system and can then start the program from any directory. Just with MPY cross, without directory. I only have to make the entry in the path variable once. Then I switch to my work hard drive and enter the following commands to get into the list of works.
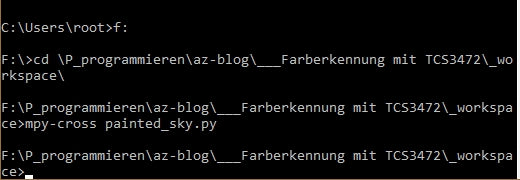
Image 5: Compilation in the list of works
I copy the path to the WorkSpace from the Explorer window and insert it into the prompt. After switching to the list of work, I can compil all the *.py files in short form.
A few simple steps lead to the extension of the trailer.
- Right-click on the Windows symbol system.

Image 6: Start - System
- Roll down all over the right window - extended system settings

Image 7: Extended system settings
- Ambient variables

Image 8: Environmental variables
- Mark and edit a path

Image 9: System variables - path - edit
- New and enter the path to mpy-cross.exe in the input line.

Image 10: New - Insert the path made of Explorer header
- Ok - Ok - Ok - Ready!
But there is still a little something to consider when you start the first compilation. The main version number of the MPY cross must correspond to the version of the Micropython interpreter. Because pip Always installed the last version, the corresponding Micropython version must also be installed. That is why I have already pointed out the firmware at the top of burning the Bin files given there.
You already know the syntax for the compiler call, so there is nothing standing in the way of translating your first Micropython file. You will be amazed that the compilate is only half as large as the starting file.
Another way to query the version of MPY-CROSS
MPY cross --version
Micropython v1.19.1 on 2022-06-18; MPY-CROSS Emitting MPY V6
If an earlier version is needed because the Micropython firmware has to be a special release, then you can go up to https://pypi.org/project/mpy-cross/#history Look at, download the WHL file, and install manually. Alternatively, the Repositorie URL can also be written in the PIP line.
PIP install -i
The URL was directly from the side https://pypi.org/project/mpy-cross/1.17/#files Copied, this saves long typing and tracking errors.
But how do I find the version number of an already translated Micropython file if you can't list it? Well, there are tools with which I can represent binary files and even edit. HXD For example, is such a program. Download the freeware and unzip it. Then double-click on hxdsetup.exe. Now simply follow the installation assistant.
start HXD And pull a *.Mpy file to the working window. The first sign is a big "M", and the second byte is the MPY version number. This does not correspond to the version of the Micropython release, but can be found in the following table:
|
Micropython release |
.Mpy version |
|
V1.19 and up |
6 |
|
V1.12 - V1.18 |
5 |
|
V1.11 |
4 |
|
V1.9.3 - V1.10 |
3 |
|
V1.9 - V1.9.2 |
2 |
|
V1.5.1 - V1.8.7 |
0 |
Table 1
This is what it looks like in HXD:

Image 11: HXD plot
We come to Linux
The MPY-Cross command in Linux also works on the command line. We get the whole Micropython package from
https://github.com/micropython/micropython/archive/refs/heads/micropython-master.zip
In any directory. I have /MCP newly created. Then I unzip the zip file. The directory created by Unzip /MCP/Micropython-Master I baptize in MCP So that the path names don't get that long.
If necessary, you have to do this unzip to install.
sudo apt-get install unzip
sudo unzip master.zip
sudo MV Micropython Master MCP
Now switch to the directory mpy_cross
CD MPY cross
Give the command there
make
a. A whole latte of screen editions rolls down and at the end is in the directory /MCP/MCP/MPY-Cross/Build The running file MPY cross. Now move this file into the directory /usr/bin.
sudo CP MPY-Cross/Build/MPY-Cross/USR/Bin/MPC
You do not have to expand the program search path under Linux, because it is already the entry anyway /usr/bin Contains.
As you can see, some things are sometimes easier under Linux than in Windows.
A small drop of bitterness remains anyway, Thonny you have to start with admin rights, otherwise it cannot access the USB device.
sudo Thonny
With the use of MPY cross, you can now accommodate larger programs secured to an ESP controller. Have fun with it!


